Showing posts with label QST 00B collection. Show all posts

Saturday, September 17, 2011

Ohio Star


We have already had this block, in the 6" format on this blog
Until I have time to write a printing-table and a new block which works with the other ones in this series, see the Ohio Star post from July 2009.

And if you do not have Collection 2 (which is sold out), use 2" QST from the downloadable QST 00B collection, and 2" squares from any number of (other) downloadable collections.

Saturday, September 10, 2011

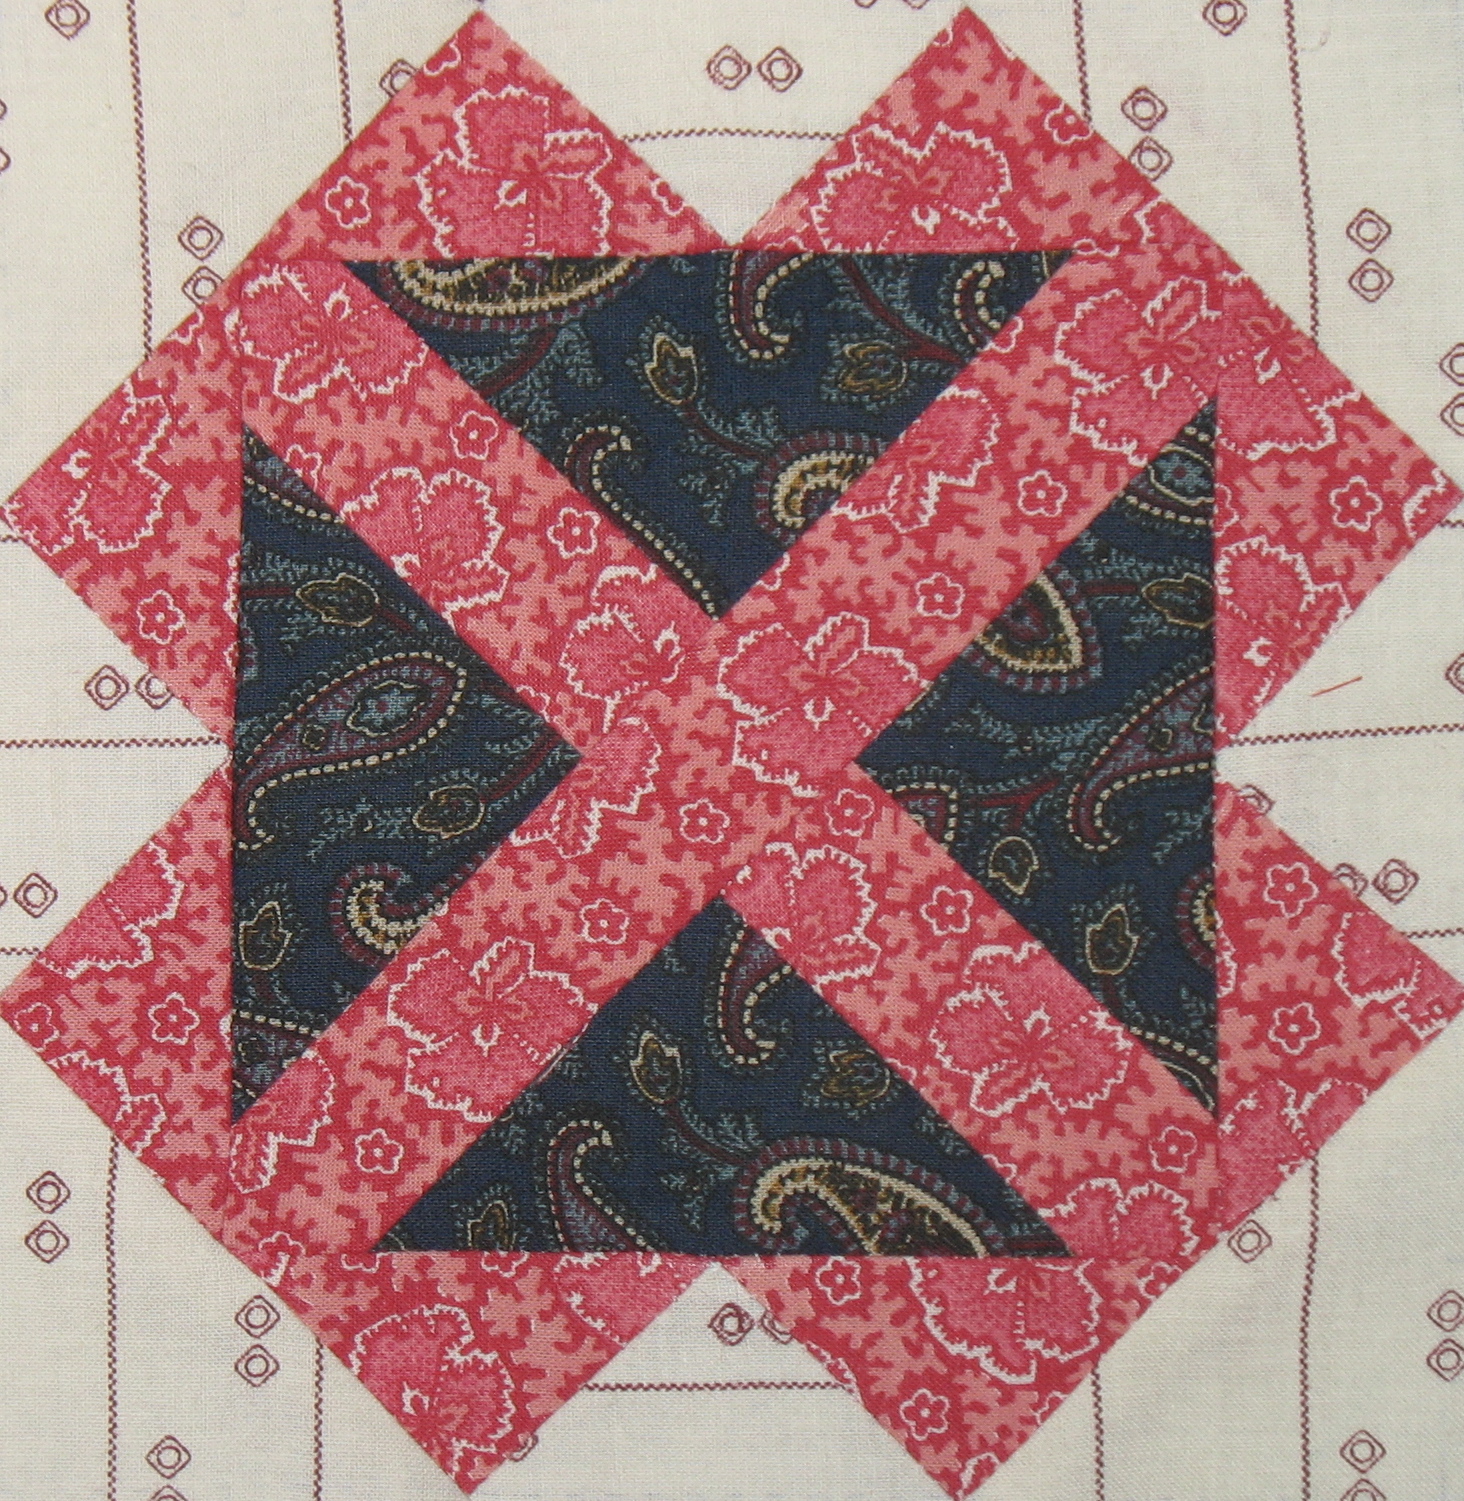
Confederate Rose


As was the case last week, this week's block on Barbara Brackman's Civil War Sampler, isn't really Inklingoable.
BUT, it is possible to fake and fudge your way through it.

Print the 2.5" QSTriangles as directed in the printing-table.
Note that you must use Layout 2 and must (!) use the size I have given. You will have a good deal of waste, but it cannot be helped if you want to use Inklingo as part of constructing the 'weird shape' you need.

From the fabric you have printed with the 2.5" QST, cut 4 squares, each with two adjacent QSTriangles.

Draw a new stitching-line, 0.25" from either of the two stitching-lines already on the two-triangle unit.
Cut another 0.25" away from the newly drafted stitching-line.
See the picture on the right. Red line is new stitching-line, green line is new cutting-line. If you have trouble seeing it, click on the picture to enlarge it.

Add these four 5-edged shapes to the 2.25" central square (cut 2.75")
Be careful NOT to stitch into the seam-allowances. Sew only from cross-hair to cross-hair (or the equivalent). That is the 'joy' of Y-seams or inset seams, but it is possible to do, even on the machine, even for me (!), but only if one does not sew into the seam-allowance but stops exactly at the corner.

Add the 1" (finished width) strips to the centre.
Strictly speaking, to make the relationship between the pieces exactly the same as is found in Brackman's block, you now need to cut the strips 1.4" for a finished width of 0.9". I have opted to make mine 1" finished (and printable with the 1" Log Cabin collection), and to print them 5" long. They need to be trimmed, BUT, if you print these, align the centre of each log with the centre seam on the 'messed with' shapes that border the centre square. That way, you can also align the 1.875" HST you need to add to the corners with the centres of both ... centre and strips, and can wait to trim until the block is actually finished.

For the 8" block, use Barbara Brackman's directions.
Printing table.

Saturday, July 30, 2011

Empty Spools


Week 31 of Barbara Brackman's Civil War Sampler is (fortunately) a very simple block.
No need for a printing-table, though, since only one shape is printable.

For the 8" size, follow Brackman's directions.

For the 6" size :
From both Background and Focus fabrics, cut a square, 7.25"
Cut in half diagonally, twice, making 4 QST of each.

You need two of those squares from each of your fabrics.

From focus-fabric :
Print two 3" QST (from the QST 00B collection). Use layout 2, in rows, and print a sheet that is 4 x 4.5" printed Landscape.

Using the technique described for the Bow Tie blocks, (shown previously on this blog) add the smaller focus-triangles to the larger background-fabric triangles.

Trim behind the smaller triangles.
Join the 4 triangles to form a square.
Finished !

Saturday, July 16, 2011

Railroad Crossing


Week 29 of Barbara Brackman's Civil War sampler is possible to make with Inklingo, but for the 6" size, you need to be able to shave 0.125" off the sides of the pieced strips.
If you print the 2.12" square for the centre (found in the Storm At Sea 9" collection), you can use that as a template for trimming your pieced striped squares, and you should be good.
The differences between what is actually needed in sizes and what you can print, are merely what happens if you stitch on or inside the stitching-line, rather than just on the outside - once your 5 central squares have been trimmed to 2.12" (finished size, un-finished size is 2.62").

Brackman's post here.
Printing table here.

Saturday, July 9, 2011

Next Door Neighbour


Week 28 of Barbara Brackman's Civil War Sampler is called 'Next Door Neighbour'.

It uses HST and QST, and is easily Inklingoable in both sizes ... however, if you want to make it in the 8" size, you need the (sold-out) Collection 2 on CD. If you don't have that, you need to hand-cut the 4" QST. Just follow Brackman's directions for her template B, and you should be good.

In the 6" size, however, it's good and easy to make with the HST 00B and QST ooB collections.

Brackman's Post.
Printing-table.

Saturday, May 28, 2011

Blockade

This week's block on the Brackman Sampler is called 'Blockade'
In the 6" format, it uses 1.5" HST and 3" QST; in the 8" format, it calls for 2" HST and 4" QST.
HOWever, for the growing number of people who do not have access to the (sold out) Collection 2 on CD, the 4" QST is a problem.
Not worry. By adding a few, but crucial, seams, the entire block can be made with one size HST.
I've made two printing-tables for each size. One with the big QST, the other without the QST.


... oh, and for once, I've made the block as well, and you can see what I mean. This block is made entirely from HST.

Picture on the left shows the HST-squares before joining.

Brackman's post here.
Printing-tables here.

Saturday, May 7, 2011

Missouri Star


Week 19 of Barbara Brackman's Civil War Sampler quilt is called Missouri Star

Now, isn't it fortunate, that this week, with the square in a square for the centre, of the block, that Linda has just made a post on her 'All About Inklingo' blog, which deals with how you get from a known size HST to an unknown size square (or vice versa). Go check out the Measurements of Half Square Triangles post.

This week's block is fully Inklingoable in the 6" format, and almost fully Inklingoable in the 8" format (fully Inklingoable only if you've got the sold-out Collection 2 on CD).

And please note : When you make the star-points, do not make 8 identical ones. If you do, you'll get different coloured tips. Make two mirror-image set of each 4 star-points.

Brackman's Post.
Printing Table.

Saturday, April 9, 2011

Fort Sumter


Completely re-written ! on June 3, 2011

This weeks block on Barbara Brackman's Civil War Quilt Sampler is not really inklingoable in the 8" format, however, with the advent of the 0.75" Log Cabin collection, the 6" size is fairly easy to do, and without all the tweaking the original posting necessitated.

Only one thing to tweak : The new directions require you to print logs that are 0.75 x 3" (finished size). You only need logs that are 2.75" long (finished size), so this is what you do.
Print the logs, then cut away one seam-allowance on the long side, and you have the perfect lenght.
And that's it ! And no, you don't need the stitching-line, you can follow the stitching-line on the 0.75" square that you will be joining to it.

There is no printing-table for the 8" block, since only one of the shapes is genuinely inklingoable, and that's the 1" square she uses for cornerstones on the centre square, but there is a brand new printing-table for the 6" version.

Brackman's post.
Printing table (6" block only), also re-written on June 3, 2011

Sunday, January 23, 2011

Texas Tears


This week's block on Barbara Brackman's Civil War sampler is called Texas Tears.

The 6" format is inklingoable, but the larger sizes might need the sold out Collection 2 on CD. You can get far with the HST 00B collection, though.

The 8" format is mostly Inklingoable, IF you have the sold-out Collection 2 on CD. That one has HST and QST up to 4.5", and you need the big sizes for this one.
If you 'only' have the HST 00B collection, however, the 8" block is not really feasible to do with Inklingo.

Printing Table here. Updated on May 23, 2011
Piece the block as shown by Brackman on her blog.

Friday, April 9, 2010

Old Maid's Puzzle 1


There are many blocks with the name "Old Maid's Puzzle", and the next few blocks will be some of the blocks thus named.
This block is BB # 3220 and JB 75-12. It can be made with Inklingo, exactly as it is shown in both collections, however, for ease of making it, I have added a few seam-lines.

Print-table in pdf.format here.

Background-fabric
1 square (unprinted) 4.25"
2 QST, each 3"
4 HST, each 1.5"

Focus-fabric
12 HST, each 1.5"
2 QST, each 3"


Make 4 HST-squares, each 1.5"
Make the centre 3" QST square
Make 4 Flying Geese units, using the fast, no-waste method from Linda Franz's Inklingo homepage (here)

Lay out the block. It is a basic 9-patch once the units are joined, but make sure they turn the right way in relation to each other.

Make two units, each with a Flying Goose, and a 1.5" HST-square on either side of it.
Make one unit of the 3" QST-square, with a Flying Goose on each side of it.
Join the 3 strips
Finished

Friday, April 2, 2010

Wild Goose Chase


Barbara Brackmann # 2905a; Jinny Beyer 165-7

This is probably the block that most people associate with the name "Wild Goose Chase".
Uses either Collection 2 OR the downloadable HST 00B and QST 00B collections. If you do not have Collection 2, but "only" the downloadable collections, you need to make the large QST the old-fashioned way.
If you have the POTC / Inklingo Lite 4 collection, that comes in useful too.

Fabric-printing table here (click the link, and download a pdf-file)

IF you are iffy about downloading from box.net, download Monkey's Cheat Sheet from Linda Franz's page, and fill in the appropriate bits yourself.

Fabric 1 (background)
1 square, 1.41"
16 HST, 1"

Fabric 2 (focus 1, medium)
4 QST, 4"

Fabric 3 (focus 2, dark)
4 HST 1"
32 QST 1"

Since the Geese in this block finishes at 0.705 x 1.41", and are on the diagonal, you need to make them the old-fashioned way, rather than Linda's Fast method. The good thing is, that by using the HST and QST required, you will have straight-on-grain the right way, and you will not need to mess around with measurements like 0.705" :-)

Making the block

Make 16 Flying Geese the old-fashioned way, adding two dark, 1" QST to each of the background-fabric 1" HST.

Make 4 strips, each consisting of 4 Flying Geese.

Add a dark fabric, 1" HST to the background-fabric end of each of the strips.

Lay out the block.

Make two units, each consisting of one strip, flanked by two 4" QST, so the dark end of the strip forms the corner.

Make one unit with the square, flanked by two strips.

Join the 3 units.

Finished !

Friday, January 22, 2010

Northumberland Star


Barbara Brackmann # 2201 b : "Northumberland Star or Eight-pointed Star"

When blocks have Flying Geese on the diagonal, and you want them to finish at a certain size (e.g. the 6" that this blog aims towards), it isn't possible to make the geese the fast way that has been used in the previous blocks.
The Flying Geese in this block measure 1.06 x 2.12". This - happily - coincides with the diagonal measurments on the 1.5" HST (2.12" on the diagonal) and 1.5" QST (1.06" on the diagonal).


Fabric-requirements

Fabric 1 (Background / Light)
4 HST, 3"
5" square

4 squares. 1.5" - not printable
4" square (cut each square 2")

4 HST, 1.5"
3 x 5.25"

Fabric 2 (medium)
2.12" square
Either cut 2 5/8" (2.625") or use the diagonal of the 1.5" HST for "ruler"

Fabric 3 (dark)
16 HST, 1.5"
5.75" square

Making the block :
When making the component parts of this block, be careful. You have bias all over the place, but that is so you can have the grain the right way in most of the pieces of the block once it is finished.

Make 4 Flying Geese the old-fashioned way, using one 1.5" HST of background-fabric, with two 1.5" QST

Join two 1.5" QST to two adjacent sides of each of the four background-fabric squares.

Join a Flying Goose to each of the square-with-QSTriangles units

Lay out the block

Join a 3" QST to each side of two of the Flying Geese units.

Join a Flying Goose unit to two opposite sides of the fabric-2 square

Join the three units

Finished !